


Forgive the awful photography. Since surgery I cannot lift my camera to eye level and hold long enough to compose and snap. These photos are taken with my ipad... so just existing lighting.
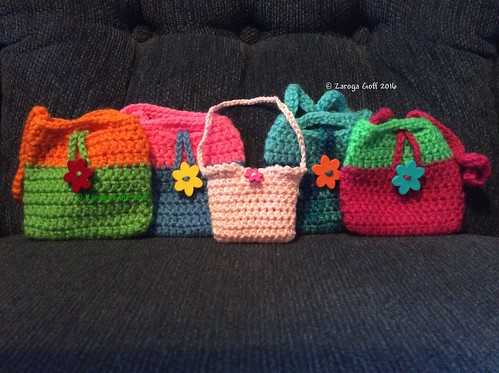
My latest projects have been bags/purses. These Little Girl Mini Purses (just click on the link to go to pattern) were fun to make.
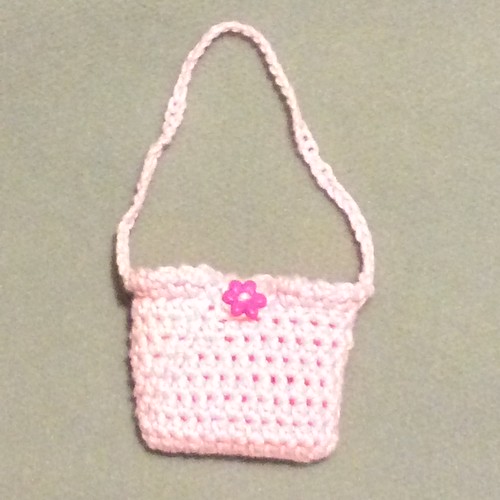
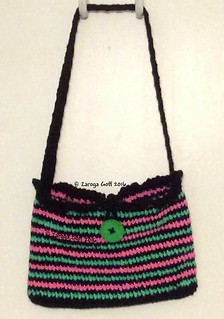
The little pink bag in the photo is one I made for grand-darling Mary's American Doll.
A closer look at it. Hard to photograph with that sparkle in it.
You are welcome to use the pattern, but please do not copy and paste the pattern into your blog or web page. You can make items to sell with the pattern, but not sell the pattern. Please link back to this post.
You can either copy and paste the pattern into your word program or email me at fourof5zs@yahoo.com . Another option is to add a Print Friendly Button to your browser. I am sorry. The way my blog is configured does not support me directly putting it in my blog.
HANDBAG FOR AMERICAN GIRL DOLL
Pattern Design by Zaroga Goff
YARN: Pink Sparkle, I Love This CottonHook: G
Very small button
Markers
Chain 13
R-1: (crochet in back bump of chain) hdc in 3rd chain from hook and in each stitch with two hdc in last st. turn and 2 hdc in other side of stitch. continue hdc down row, 2 hdc in last stitch. ss to top of beg chain. 26 hdc
R-2: ch 1 hdc in same stitch as ss. hdc around, join with ss in top of hdc.
R-3--10: repeat r-2
Mark sides, center front and center back
R-11: ss to center side, sc ch 2 around to center of back, ch 10, ss in same stitch. continue around with sc ch 2. ss in beginning sc. Do not fasten off
Strap: ch 50 and ss to other side. weave in ends and sew button on center front.
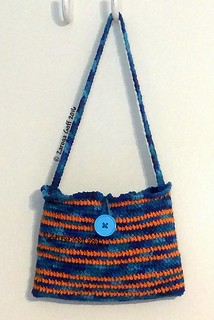
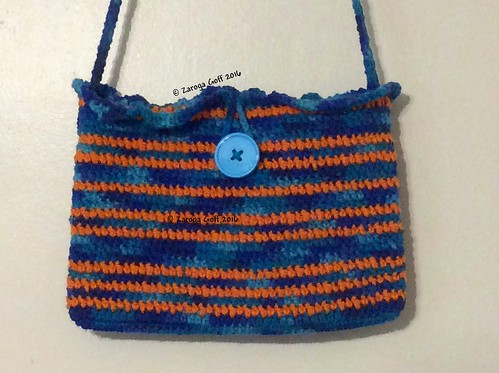
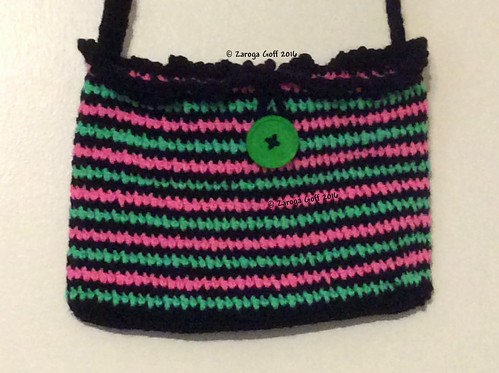
I also made these two bags for my other two grand-darlings, Carly and Jaime.
You are welcome to use the pattern, but please do not copy and paste the pattern into your blog or web page. You can make items to sell with the pattern, but not sell the pattern. Please link back to this post.
You can either copy and paste the pattern into your word program or email me at fourof5zs@yahoo.com . Another option is to add a Print Friendly Button to your browser. I am sorry. The way my blog is configured does not support me directly putting it in my blog.
There may be mistakes in the pattern; that can happen when you write it down after the fact. Please let me know if there is a mistake or if you have a question about the pattern. fourof5zs@yahoo.com
GRAND-DARLING PURSE
Pattern Design by Zaroga Goff
Pattern Design by Zaroga Goff
My purse pre-washed is
approximately 11 and a half inches wide and 8 inches tall flatten (which
includes base of purse).
Yarn: Worsted Weight 4. I used Red Heart Super Saver
scraps. First bag: Macaw and Pumpkin. Second bag: Black, Shocking Pink, Spring Green If using more than 3 colors I suggest fastening off each color. With two or three colors the yarn can be carried up the
side. Change colors at the ss join. I think in one color maybe a skein this size purse.
Hook: H. I did not measure my gauge. Make you swatch using different hooks and the sc, dc alternating stitch and see which look you like best. My stitches are close to what they say on the wrapper.
Markers: Mark first stitch of round and stitches specified. I also mark my last stitch of round so I do
not put a stich in a chain 1
DO NOT TURN WORK EXCEPT in STRAP
Chain: 40
rd 1: (working in back hump of chain) 2 sc second chain from hook and sc each
chain; in last chain 2 sc (mark the first stitch for next rd); working in
opposite side of chain: 2 sc in same chain as last 2 sc; sc across in top v of
stitches, 2 sc in last stitch (mark the first stitch for next rd); join with ss
to beg sc. (41 stitches each side; 82 stitches in round)
rd 2: 2 sc in next 2 stitches; sc each stitch until last 2 two
stitches on that side (starting with stitch you marked) 2sc in next two sc;
continuing on next side, 2sc in next 2 stitches; sc in each stitch until you
reach your marker, 2 sc in next 2 sc; join with ss. (45 stitches each side; 90 total for rd)
rd 3: ch 1 hdc in same stitch as ss: hdc in each stitch around; join
with ss (90)
rd 4: ch 1; sc in same stitch as ss, dc in next stitch; sc, dc around. join with ss
Repeat rd 4 (you sc in sc stitches and dc in dc stitches) until
desired height. DO NOT FASTEN OFF
Marking center front for button and sewing button: (front is opposite side of joining of rows and back is side of joining rows). Figure out where you want your button and place marker. I placed mine in the 7th row from top. I used a large button. My yarn needle does not go through. I have an upholstery needle and it worked well. With yarn thread needle with a long piece of yarn. Leave a tail long enough to tie knots and weave ends through purse a few inches. I sew button on in a cross fashion. Doing so twice. I tie the two ends of yarn together and run each end through work.. in one direction and then the other to secure. Cut yarn.
Edging: (sc goes in each stitch, the chain in between gives it a slight ruffle) sc, ch 2 around until 2 stitch before your first marker (this is side your button goes on); ss in this stitch and next 4 stitches (5 ss in all) continue sc, 2 ch around, (to form button loop) ss in marked stitch and ch appropriate amount to reach around button (I chained 25); join with ss in same stitch as last ss; continue sc, 2 ch around, join with ss; fasten off; weave in ends.
Strap: chain 4; in back hump hdc across (3 hdc); ch 1 loosely
(does not count as st); turn, hdc across. Repeat until desired length. I did about 29"
Mark center sides and
center straps on inside (pins can help hold in place) and sew in place.

No comments :
Post a Comment
Thank you for visiting my Nook. Your comments are much appreciated.
Make it a great day!
Zaroga